9 Vital Steps to Grout Patio Stones
The scent of damp earth and the firm turgor of a healthy leaf define the boundary between a chaotic landscape and a structured garden. Achieving that structure requires more than just plant selection; it demands a stable foundation. Mastering the steps to grout patio stones ensures that the surrounding rhizosphere remains undisturbed by shifting pavers or invasive weeds. This technical process prevents soil compaction and protects the delicate root systems of bordering perennials. Without a sealed surface, water runoff can erode the friable loam necessary for nutrient uptake. A well-grouted patio serves as a thermal mass, regulating localized ground temperatures and preventing sudden frost heaves that damage dormant root crowns. By stabilizing the hardscape, you create a controlled environment where moisture levels remain consistent and the soil structure is preserved. Proper installation prevents the leaching of minerals and maintains the integrity of the garden beds. This guide provides the technical protocols for sealing your patio stones with professional precision, ensuring your outdoor space functions as a cohesive biological and structural unit.
Materials:

The success of your patio depends on the substrate. Ideally, the base layer should consist of a **well-draining crushed stone** with a neutral **pH of 6.5 to 7.2** to prevent acidic runoff from affecting nearby plantings. The grout itself must be a polymeric sand or a specialized mortar mix. For the surrounding garden beds, maintain a **friable loam** with an **NPK ratio of 10-10-10** for general maintenance or **5-10-10** for root development. Ensure the **Cation Exchange Capacity (CEC)** of the soil is high, typically above **15 meq/100g**, to allow for efficient nutrient retention. You will need a stiff-bristled broom, a plate compactor for large areas, and a garden hose with a fine misting nozzle to activate the binding agents without washing them away.
Timing:
Hardiness Zones 4 through 9 provide the optimal window for this project. The ambient temperature must remain between 50 and 80 degrees Fahrenheit for at least 48 hours to ensure proper chemical bonding of the grout. Avoid periods of high humidity which can cause premature curing. In terms of the biological clock, execute these steps during the late spring or early autumn when plants are in a vegetative state or entering dormancy. This minimizes the risk of heat stress on the surrounding flora. Always check your local frost dates; the grout must be fully cured at least two weeks before the first hard freeze to prevent expansion cracks caused by ice crystals within the grout matrix.
Phases:

Sowing the Foundation
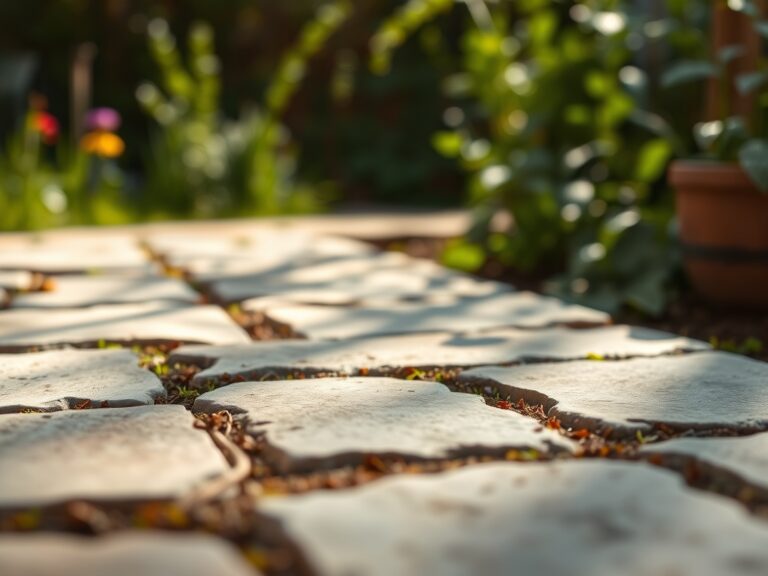
Clear all debris from the joints using a stiff brush. The depth of the joints should be at least 1 inch to provide sufficient surface area for the grout to adhere. If the stones have shifted, reset them on a bed of leveling sand.
Pro-Tip: Maintaining a consistent joint depth prevents uneven moisture distribution. This is critical because capillary action can pull water from the surrounding soil, leading to localized saturation that may drown nearby root systems.
Transplanting the Grout
Pour the polymeric sand or mortar mix over the stones. Use a broom to sweep the material into the gaps. Ensure the joints are filled to within 1/8 inch of the stone surface. Use a plate compactor or a rubber mallet to vibrate the stones, which settles the grout and removes air pockets.
Pro-Tip: Settling the material eliminates large macropores. This prevents mycorrhizal fungi from colonizing the gaps, which sounds beneficial but can actually lead to grout degradation as the fungal hyphae expand and contract.
Establishing the Bond
Mist the surface with water in three separate intervals, waiting 10 to 15 minutes between each. The water should penetrate the full depth of the grout without pooling on the surface. Allow the area to dry for 24 to 72 hours depending on humidity levels.
Pro-Tip: Controlled hydration is essential for chemical polymerization. Rapid drying can lead to brittle joints, while over-saturation causes the binder to leach out, a process similar to how excessive irrigation leaches nitrogen from the rhizosphere.
The Clinic:
Symptom: White, powdery residue on the stone surface (Efflorescence).
Solution: This is caused by mineral salts migrating to the surface. Scrub with a solution of 6 parts water to 1 part white vinegar to neutralize the salts.
Symptom: Grout is cracking or pulling away from the stone.
Solution: This indicates a lack of compaction or poor hydration. Remove the loose material and reapply, ensuring the joint is at least 1 inch deep.
Symptom: Yellowing leaves on plants bordering the patio (Nitrogen chlorosis).
Fix-It: The grout runoff may have temporarily spiked the soil pH. Apply a chelated iron supplement and a high-nitrogen fertilizer (20-0-0) to restore the chlorophyll levels and lower the pH.
Symptom: Moss or algae growth in the joints.
Solution: This indicates poor drainage. Increase the slope of the patio to 1/4 inch per foot and ensure the substrate is a high-porosity crushed stone.
Maintenance:
Maintain the patio by sweeping regularly to prevent organic matter from decomposing in the joints. For the surrounding landscape, provide 1.5 inches of water per week at the drip line of all plants. Use a soil moisture meter to verify that the patio is not causing water to pool in specific zones. If weeds appear in the grout, use a hori-hori knife to remove them by the root, ensuring you do not disturb the surrounding bond. Prune overhanging branches with bypass pruners to allow maximum sunlight to reach the patio surface, which helps prevent the growth of anaerobic bacteria in the joints.
The Yield:
While a patio does not produce a caloric yield, its "harvest" is the longevity of the hardscape and the health of the adjacent garden. A properly grouted patio increases the thermal stability of the ground, which can extend the growing season for nearby vegetables by up to two weeks. To maintain the "day-one" structural integrity, inspect the joints every spring after the final frost. If any sections have settled more than 1/4 inch, top them off with fresh material to maintain the protective seal.
FAQ:
How long does it take for patio grout to dry?
Polymeric sand typically requires 24 to 48 hours of dry weather to cure. Mortar-based grouts may take up to 72 hours. Avoid all foot traffic during this window to prevent shifting or surface indentations.
Can I grout patio stones in the rain?
No. Precipitation during installation will wash away the binding polymers and cause a structural failure. Ensure the forecast is clear for at least 24 hours before and after the application of the grout material.
What is the best width for stone joints?
For optimal structural integrity, joints should be between 1/8 inch and 4 inches wide. Joints wider than 4 inches require a specialized high-strength mortar to prevent cracking and erosion over time.
How do I prevent weeds from growing between stones?
Using polymeric sand creates a hardened barrier that inhibits seed germination. Maintain a clean surface and ensure the joints are filled to the proper depth to prevent organic debris from accumulating in the gaps.