10 Pro Tips How to Import Rare Plants
The smell of damp peat and the crisp snap of a leaf with high turgor pressure define the stakes of botanical acquisition. When you learn how to import rare plants, you are managing a biological transition across international borders. This process requires more than a credit card; it demands a deep understanding of phytosanitary protocols and the physiological stress of transit. Success is measured by the survival of the apical meristem after ten days in a dark, desiccating cardboard box.
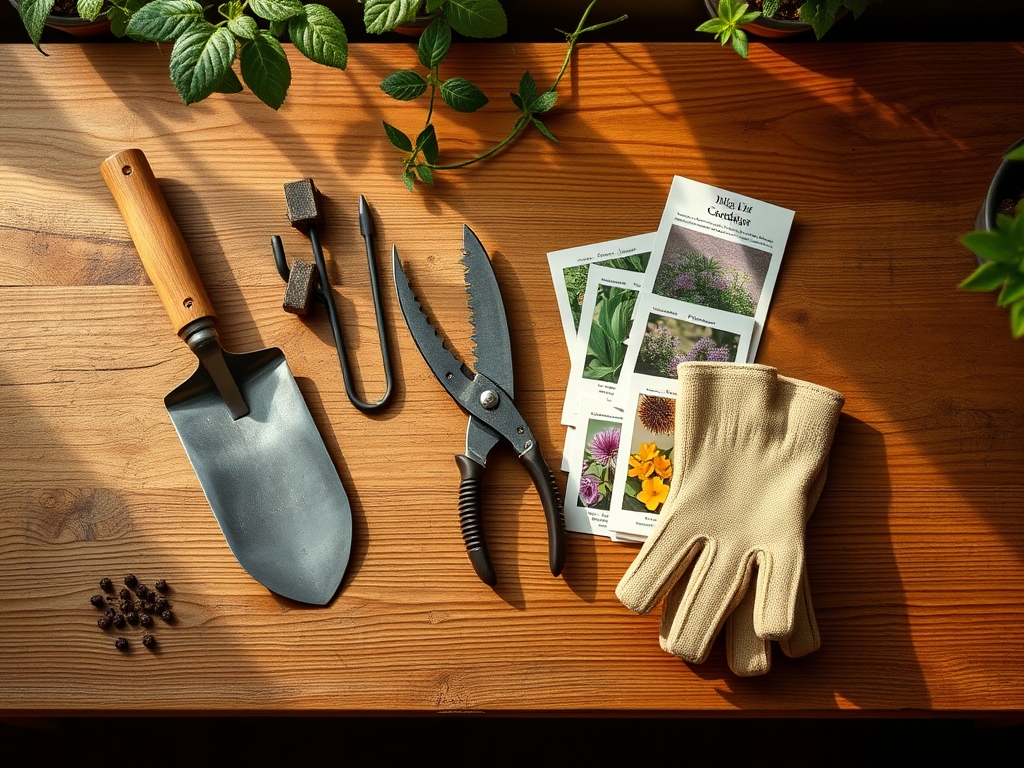
Materials:
Imported specimens often arrive bareroot or in sterile sphagnum moss. Your recovery substrate must be a **friable loam** with high porosity to prevent anaerobic conditions. Aim for a **soil pH between 5.8 and 6.2** for most tropical aroids or **6.5 to 7.0** for woody perennials. Prepare a specialized recovery mix using a **1:1:1 ratio of chunky perlite, orchid bark, and coco coir**.
Initial fertilization should be avoided until new root hairs emerge. Once established, use a water-soluble fertilizer with an NPK ratio of 7-9-5 to prioritize root development over rapid foliar expansion. Monitor the Cation Exchange Capacity (CEC) of your media; a higher CEC ensures the substrate retains essential nutrients like potassium and magnesium against leaching during frequent recovery misting.
Timing:
Timing your import is a matter of thermal safety. Never ship when temperatures at the origin, transit hubs, or destination fall below 55 degrees Fahrenheit (12.7 Celsius). For growers in Hardiness Zones 5 through 8, the optimal window is between late April and early June. This aligns with the natural transition from the dormant phase to the vegetative stage, ensuring the plant has maximum metabolic energy to repair cellular damage.
Respect the biological clock of the species. Importing during the reproductive stage (flowering) is high risk; the plant diverts carbohydrates to seed production rather than root repair. Aim for the early vegetative phase when auxin levels are naturally high, facilitating rapid adventitious root formation upon arrival.
Phases:
Sowing and Preparation
Before the plant leaves its country of origin, ensure it has been hardened off. The seller must provide a Phytosanitary Certificate, a legal document verifying the shipment is free of regulated pests. For US importers, any shipment of more than 12 plants requires a USDA PPQ 587 permit.
Pro-Tip: Request that the seller treat the roots with a synthetic auxin (IBA) before packing. This chemical trigger stimulates the pericycle cells to initiate root branching, countering the inevitable root die-back caused by the lack of gas exchange in shipping containers.
Transplanting and Rehydration
Upon arrival, the plant will be in a state of extreme moisture deficit. Submerge the roots in room temperature distilled water for 2 to 4 hours. Do not exceed this window, as prolonged submersion can lead to cellular hypoxia. Inspect the rhizome and roots for necrotic tissue; remove any mushy sections using a sterilized hori-hori knife.
Pro-Tip: Use a mycorrhizal inoculant during the first potting. These symbiotic fungi extend the reach of the root system, increasing the surface area for water absorption by up to 1,000 percent, which is critical when the primary root hairs have been stripped during cleaning.
Establishing and Acclimation
Place the plant in a high-humidity environment (80 to 90 percent) to reduce the vapor pressure deficit (VPD). This prevents the plant from losing more water through its stomata than it can take up through its compromised roots. Gradually lower the humidity by 5 percent per week until it matches your ambient room conditions.
Pro-Tip: Maintain a consistent photoperiod of 12 to 14 hours using full-spectrum LED lights. Consistent light cycles prevent the plant from entering a state of senescence, a hormonal shutdown often triggered by the erratic light exposure experienced during international transit.
The Clinic:
Rare imports often exhibit physiological disorders due to the trauma of shipping and sudden environmental shifts.
- Symptom: Interveinal chlorosis (yellowing between green veins) on new growth.
- Solution: This indicates an Iron (Fe) deficiency, often caused by a substrate pH above 7.0. Lower the pH using sulfur or use a chelated iron foliar spray.
- Symptom: Rapid leaf drop or abscission of green leaves.
- Solution: This is a stress response to sudden temperature fluctuations or ethylene gas buildup in the shipping box. Increase humidity and provide a stable 68-75 degree Fahrenheit environment.
- Symptom: Leaf tip burn or marginal necrosis.
- Solution: Often caused by salt accumulation from hard water or over-fertilization of a stressed plant. Flush the substrate with three times the pot's volume in distilled water.
The Fix-It: For general Nitrogen chlorosis (overall paling of older leaves), apply a diluted 5-1-1 fish emulsion. This provides a gentle nitrogen boost without the risk of osmotic root burn associated with synthetic salts.
Maintenance:
Precision is the difference between a thriving specimen and a dead one. Use a soil moisture meter to ensure the substrate stays at a "Level 3" or "Moist" setting; never allow it to reach "Dry" or "Saturated." Most tropical imports require approximately 1.5 inches of water per week delivered directly at the drip line to encourage outward root expansion.
Keep a pair of bypass pruners sharp and disinfected with 70 percent isopropyl alcohol. Use them to remove any yellowing leaves, which allows the plant to redirect energy toward the terminal bud. If the plant is a climber, provide a cedar plank or moss pole early; the physical contact triggers thigmotropism, leading to larger leaf morphology and increased structural stability.
The Yield:
While rare imports are often ornamental, the "yield" is defined by successful propagation and leaf size. To maximize the aesthetic output, monitor the light intensity using a PAR meter. Most rare aroids thrive at 200 to 400 micromoles. If you intend to take cuttings, wait until the plant has produced at least five new leaves in your care. Use a clean cut below the node to ensure the axillary bud remains intact for future growth. Handle all cuttings with care to avoid bruising the vascular tissue, which can invite fungal pathogens.
FAQ:
Do I need a permit to import plants?
Yes, in the United States, a USDA PPQ 587 permit is required for importing more than 12 plants. Even for fewer plants, a Phytosanitary Certificate from the exporting country is mandatory to clear customs and prevent destruction of the shipment.
How do I prevent root rot after importing?
Use a highly oxygenated, soilless medium like perlite or leca for the first 14 days. This allows for maximum gas exchange. Avoid heavy organic soils that retain excessive moisture and promote the growth of anaerobic bacteria around stressed root systems.
What is the best temperature for acclimating imports?
Maintain a steady temperature between 70 and 75 degrees Fahrenheit. Avoid placing plants near HVAC vents or drafty windows. Consistent warmth supports metabolic enzymes, while fluctuations can trigger dormancy or leaf abscission due to thermal shock.
How long should I quarantine new imports?
Quarantine all imports for a minimum of 40 days. This window allows for the lifecycle completion of potential pests not caught during inspection. Use this time to monitor for systemic issues that may not be visible upon arrival.